-
 gooliya.papa
 - 27 Apr, 2026
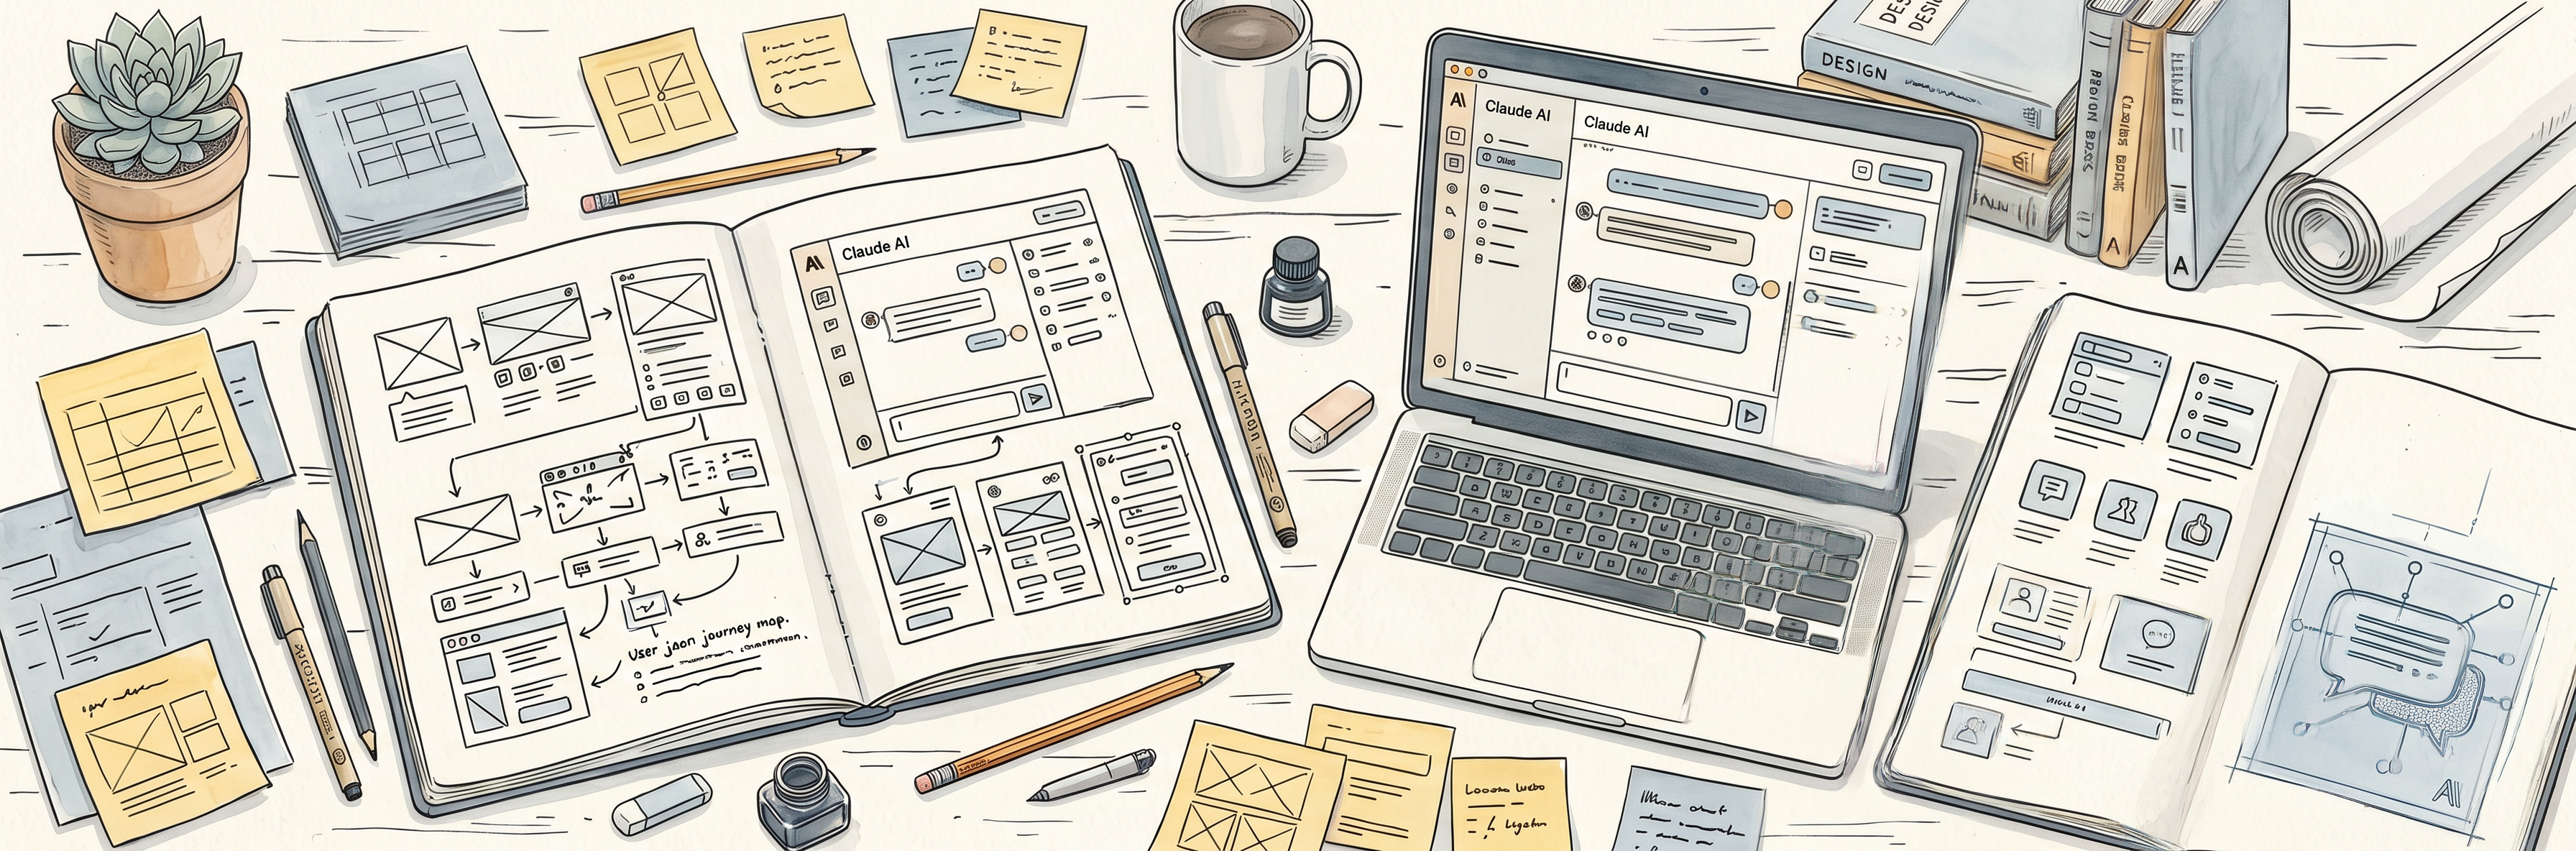
Claude Design 實戰七招:Anthropic 設計師 Ryan Mather 的使用心得
Ryan Mather 是 Anthropic 的內部設計師,每天都在用 Claude Design 做真實的設計工作。 他整理了七個實際跑出來的心法,不是理論,是他自己踩過坑之後的總結。1. 先把設計系統和核心畫面蓋好 花一小時把設計系統和主要畫面設定好,然後反覆打磨到你滿意。 這是最值得前期投入的事。後面所有工作都建在這個基礎上,後續省下來的時間遠遠超過你投進去的。 別急著往前衝,地基沒打好,後面越跑越累。2. 會議中直接跟工程師一起迭代 Claude Design 出 mockup 的速度非常快,快到你可以在會議裡當場生出畫面。 不用會後再整理、再傳檔、再確認。想法當場變成畫面,工程師直接看到,討論馬上進入細節。 很多時候,一場會議就能把新功能的設計方向定下來。3. 用 Comment 工具做細節修改 初稿出來,通常有幾十個地方想調。 這時候不要用文字一條一條描述,直接點上去、標註、批改。又快又準,幾乎不會有誤解。 這個習慣建立起來之後,細節調整的速度快很多。4. 請 Claude 做互動 Demo 影片 Claude Design 的能力比較接近 Claude Code,而不是一般的畫布設計工具。 你能想到的東西,它幾乎都能做。包括把你的設計概念做成可以播放、可以展示的動態 Demo。 下次開提案會議前,可以試試讓 Claude 先幫你把互動流程跑出來。5. 串接 Docs、Slack 等工具 把常用的工具接起來之後,你可以直接下這種指令: 「請讀這份會議紀錄,針對所有提出的問題,做一份探索不同設計方案的簡報。」 然後去倒杯水、散個步、回來用全新的眼光看結果。 這種工作方式一旦習慣,很難回到以前那種一個 tab 一個 tab 手動複製貼上的模式。6. 讓 Claude 幫你做客製化的即用工具 Ryan 特別強調這一點:不要用操作 Figma 的邏輯來用 Claude Design。 它是完全不同的東西,有不同的強項。大膽去實驗,玩出你自己的用法。 他說,真正開始這樣做之後,設計的速度和品質都明顯上了一個層次。7. 知道什麼時候要放慢 速度不是全部。 新 icon、插圖、名稱——這些細節看起來小,但對使用者的影響往往不成比例地大。 在 AI 輔助設計的節奏下,知道什麼時候該停下來、親手慢慢打磨,本身就是一種設計能力。這七招合在一起,其實是一種新的設計工作方式:前期投資、快速迭代、適時慢下來。 你現在的設計流程裡,哪個環節最讓你覺得卡關?也許 Claude Design 可以從那裡開始試。Ref https://x.com/Flomerboy/status/2045162321589252458
- gooliya.papa
- 24 Apr, 2026
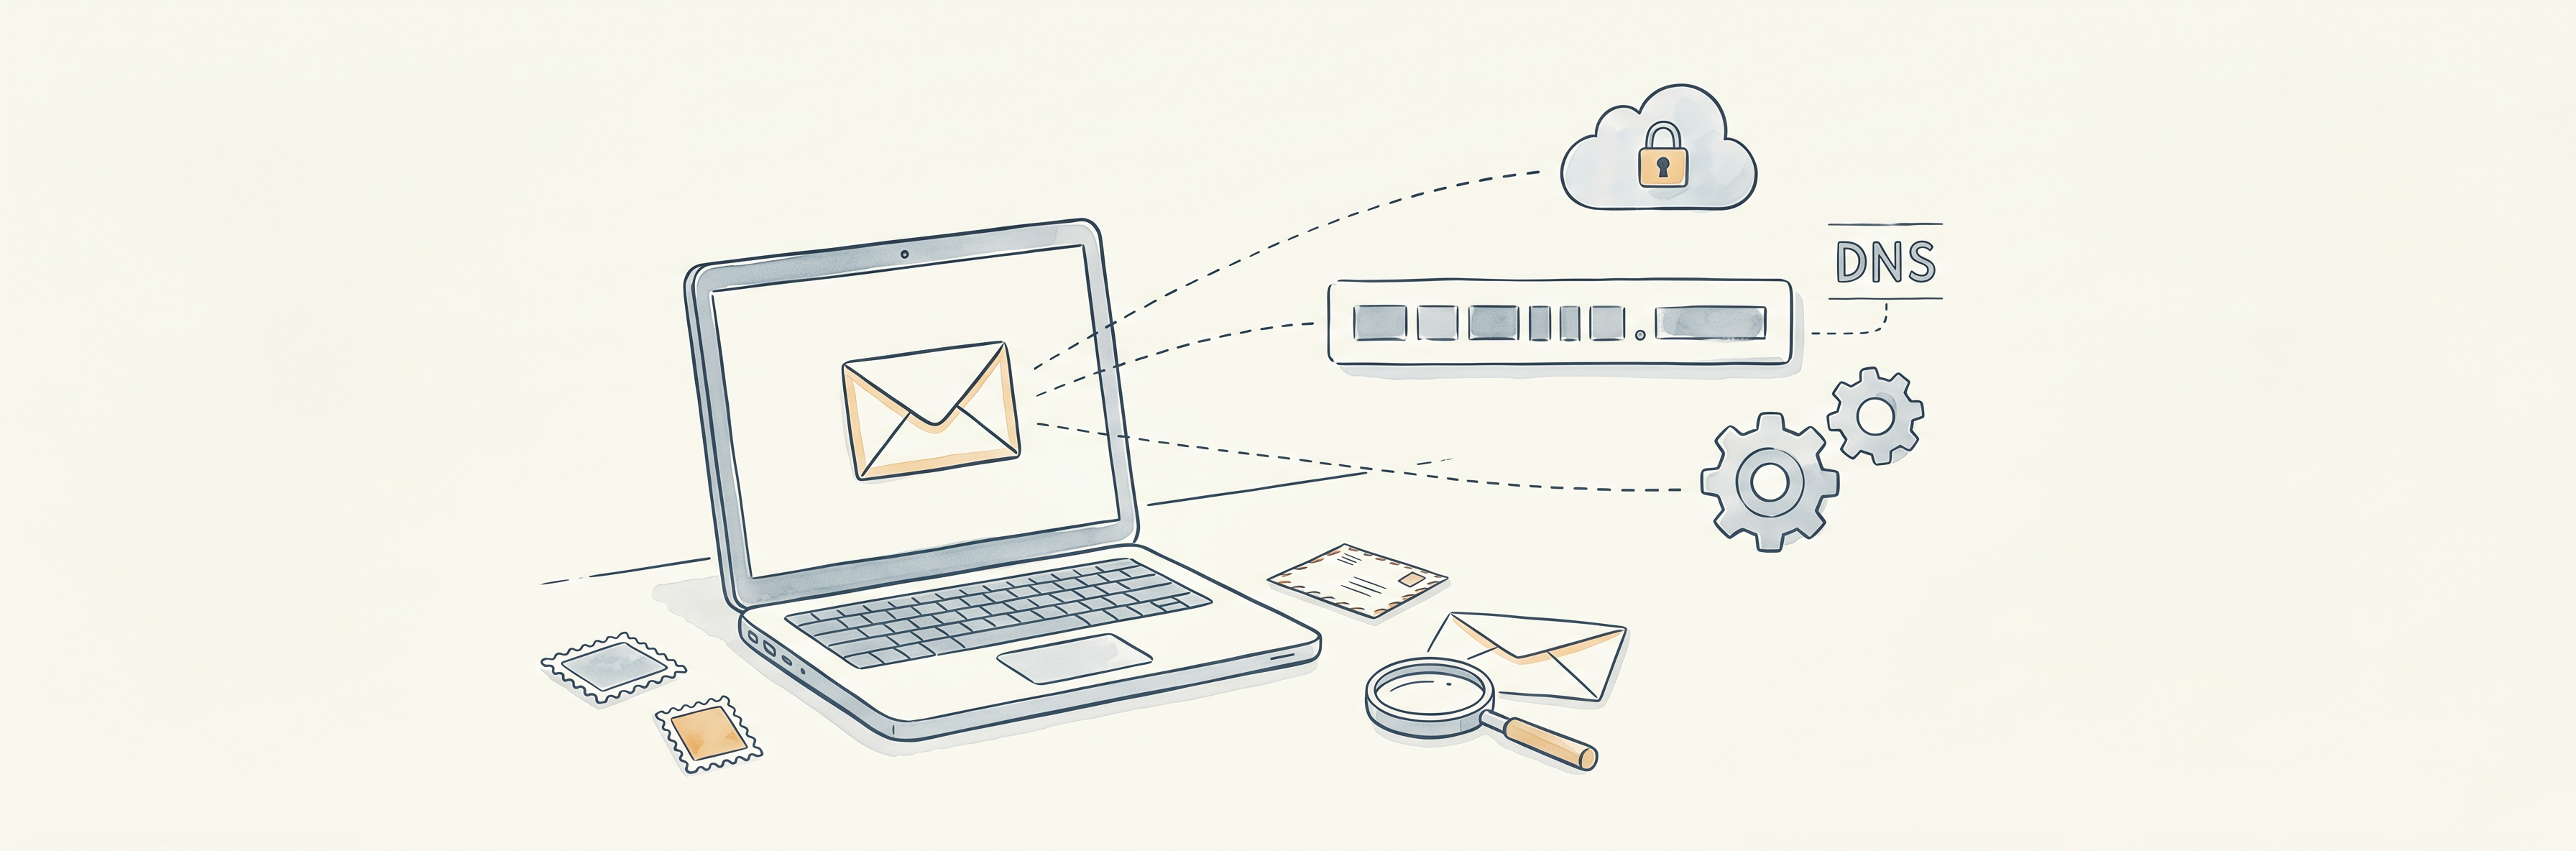
用 iCloud+ 打造專屬 Email Domain:完整步驟教學與實用心得
想要有一個像 [email protected] 這樣的信箱,其實不難。Apple 在 iCloud+ 裡內建了「自訂電子郵件網域」的功能,不用另外架伺服器,也不用裝額外的軟體。 我自己設定完大概花了二十分鐘,用了三個月,整理一下完整步驟和真實心得。iCloud+ 自訂電子郵件網域是什麼 iCloud+ 是 Apple 的付費方案,月費從 NT$30 起。除了擴充雲端空間,還有幾個進階功能,其中一個就是讓你把自己買的網域(像 yourname.com)跟 iCloud Mail 綁在一起。 綁好之後,收發信件都走你的自訂地址,但管理介面還是原本的「郵件」App,不需要切換平台。開始前要準備什麼iCloud+ 訂閱:任何付費方案都支援,沒有例外。 已購買的網域:GoDaddy、Cloudflare Registrar、Namecheap 都可以買。 DNS 管理權限:需要能夠自己新增 MX、TXT、CNAME 記錄。完整設定步驟 步驟一:進入 iCloud 設定 打開 icloud.com,用 Apple ID 登入。點右上角的帳號名稱,選「iCloud 設定」,在左側選單找到「自訂電子郵件網域」,點進去。步驟二:新增網域 點「新增網域」,輸入你的網域名稱,例如 yourname.com。 接著選「個人使用」或「家人共用」。家人共用可以讓最多五位家庭成員各自建立不同的信箱地址,共用同一個網域。步驟三:設定 DNS 記錄 這一步是整個流程的關鍵。Apple 會給你一組 DNS 記錄,你需要手動加到你的網域管理後台。通常包含:MX 記錄:把郵件導向 iCloud Mail 的伺服器。 TXT 記錄:驗證網域所有權,也用來設定 SPF,避免信件被當成垃圾郵件。 CNAME 記錄:部分情況需要,用來設定 DKIM 郵件簽署。以 Cloudflare 為例,進 DNS 設定頁後,點「新增記錄」,依 Apple 提供的值填入類型、名稱和內容就好。DNS 變更通常幾分鐘內生效,但最久可能要等到 48 小時,這段時間耐心等就好。 步驟四:驗證網域 回到 iCloud 設定頁面,點「驗證」。設定正確的話,系統會顯示驗證成功。 如果失敗,可以去 MXToolbox 查一下 DNS 記錄有沒有正確傳播,通常是哪筆記錄填錯或還沒生效。 步驟五:建立信箱地址 驗證過了,就可以建立信箱了。輸入你要的前綴,像是 hello、contact,或直接用你的名字,點「建立」就完成了。使用心得 好的地方是整合很順。iPhone 的「郵件」App 直接收發,什麼都不用另外安裝。對 Apple 生態系的用戶來說,幾乎是零學習成本。垃圾信件的過濾也還不錯,不太需要手動清理。 不過 iCloud Mail 的功能確實比 Gmail 或 Fastmail 陽春一些。沒有標籤分類,郵件規則的設定也很有限。如果你需要複雜的信件管理,可能要搭配其他工具一起用。 還有一點要注意:自訂網域信箱是綁在 iCloud+ 訂閱上的。一旦取消訂閱,這個信箱就無法繼續使用了。最後 對 Apple 重度使用者來說,這個功能幾乎是免費的。已經訂 iCloud+,不需要額外付費,設定也不複雜。整體來說是一個夠用、整合性高的方案。 如果你平常主要用 Apple 裝置處理信件,這個設定值得試試。你現在用的是哪個自訂信箱服務?有沒有覺得比 iCloud Mail 更順手的選擇?
- gooliya.papa
- 13 Apr, 2026
用 Vibe Coding 打造台灣國定假日 API,沒有寫任何一行程式碼
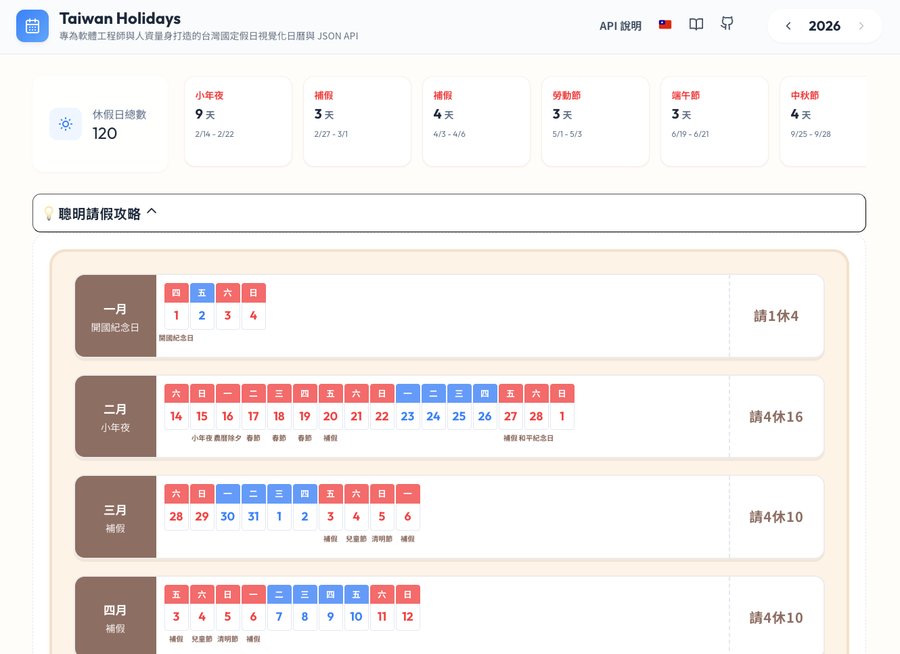
這是什麼? Taiwan Holidays API 是一個台灣國定假日的 JSON API 服務,提供:完整日曆資料(每日上班 / 放假狀態) 國定假日清單(中英雙語) 補班日查詢 農民曆支援(農曆日期、傳統節慶、二十四節氣) 透過 jsDelivr CDN 免費存取,支援 2017 ~ 2026 年聽起來很正常,對吧? 但這整個專案,我沒有寫任何一行程式碼。什麼是 Vibe Coding? Vibe Coding 是一種新的開發方式:你只負責描述「你想要什麼」,AI 幫你把程式碼寫出來。你不需要懂每一行在做什麼,只需要知道你想要的結果,然後不斷對話、調整、驗證。 這個詞由 Andrej Karpathy 提出,概念很簡單:程式碼是 AI 的事,你只需要有想法。怎麼做出來的? 整個過程大概是這樣:告訴 AI「我想要一個台灣假日的 JSON API,資料來自政府開放資料」 AI 生成資料解析腳本、目錄結構、資料格式設計 繼續描述需求:「我要農民曆」、「我要中英雙語」、「我要補班日」 AI 補上 GitHub Actions,讓資料自動定期更新 設定 jsDelivr CDN,讓任何人都能免費呼叫API 長這樣 所有資料都可以直接透過 CDN 取得,以 2026 年為例: # 完整日曆 https://cdn.jsdelivr.net/gh/imsyuan/taiwan-holidays/data/2026.json# 國定假日 https://cdn.jsdelivr.net/gh/imsyuan/taiwan-holidays/data/2026/holidays.json# 補班日 https://cdn.jsdelivr.net/gh/imsyuan/taiwan-holidays/data/2026/makeup-workdays.json回傳格式長這樣: { "date": "20260101", "week": "三", "isHoliday": true, "description": "開國紀念日", "lunar": { "date": "十二月初二", "festivals": [], "solarTerm": null } }簡單、乾淨,可以直接接進任何系統。用 JavaScript 呼叫 const holidays = await fetch( 'https://cdn.jsdelivr.net/gh/imsyuan/taiwan-holidays/data/2026/holidays.json' ).then(r => r.json());console.log(holidays); // [{ date: "20260101", week: "三", isHoliday: true, description: "開國紀念日" }, ...]心得 Vibe Coding 不是偷懶,是一種新的生產力。 工程師的核心價值從來不是「會打程式碼」,而是能解決問題、能設計系統、能判斷品質。 AI 幫我打字,但架構是我設計的、需求是我定義的、品質是我驗收的。 這個專案從想法到上線,只花了幾個小時,換以前可能要花幾天。 省下來的時間,可以多陪小孩一點。原始碼開放在 GitHub:imsyuan/taiwan-holidays
- gooliya.papa
- 22 Dec, 2025
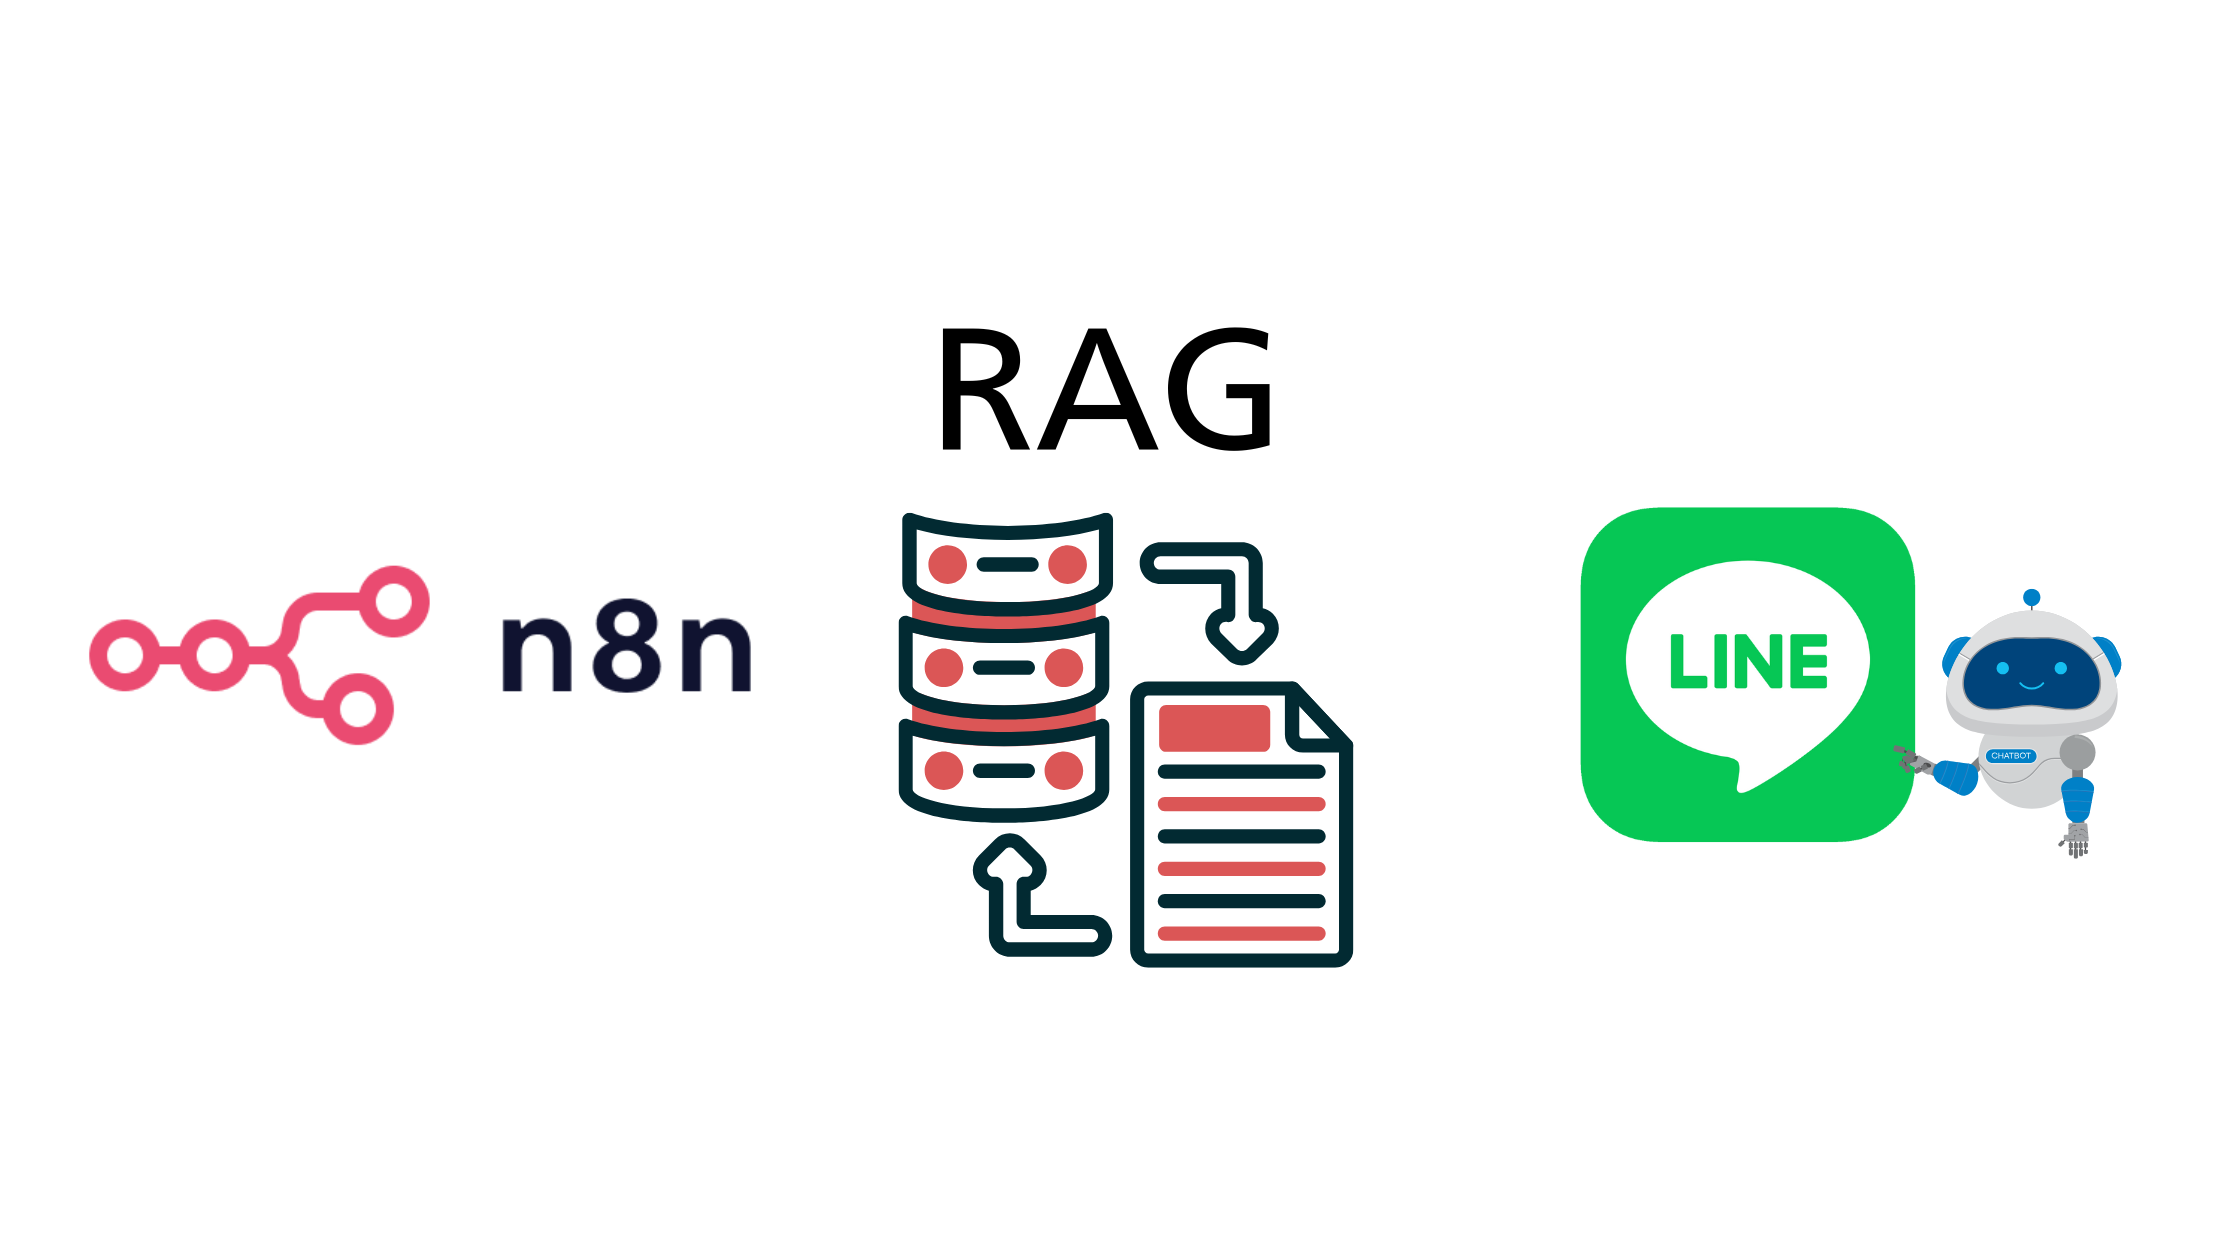
如何使用 N8N 搭配 Google Drive + RAG 建立屬於企業自己的 Line 客服 AI 機器人
最近看了許多文章、影片,都在探討 RAG 的應用,所以研究了一下 N8N 如何建立自己的 RAG 系統, 並且結合 Line 來打造一個客服 AI 機器人,這篇文章就來分享一下整個流程和步驟。 由於 AI 領域的更新,可能是以天或者甚至以小時為單位在變化,參考了很多影片後,會發現不一定時做得出來你想要的需求 總共會使用到的服務有 N8N、Line OA、Gemini AI、Pinecone、Google Drive,這些服務大部分都有免費額度可以使用 建立 Line 帳號 首先進入到 Line OA 管理後台,建立自己一個新的官方帳號 Line OA 管理取得 Channel Access Token 和 Webhook 以及點擊下方的 LINE Developers Console 可以找到 Channel Secret 這 3 個資訊在後續 N8N 的設定中會用到。RAG 介紹RAG (Retrieval-Augmented Generation) 是一種結合檢索和生成的技術,主要用於提升自然語言處理模型的性能。 在大語言模型中經常會出現「幻覺」(Hallucination) 的問題,RAG 透過引入外部知識庫來減少這種現象。 主要分成三個部分:檢索 (Retrieval):從外部知識庫中檢索相關資訊,這些資訊可以是文件、文章、數據等。 增強 (Augmentation):將檢索到的資訊與輸入的查詢結合起來,形成一個更豐富的上下文。 生成 (Generation):使用自然語言生成模型來產生回答。RAG 與 生成式 AI (Generative AI) 的主要區別於 RAG 透過資料庫中的資訊來輔助回答問題, 而生成式 AI (例如 GPT 等)則主要依賴於模型本身的訓練數據來產生內容,但不一定保證內容正確性 N8N 設定 這次總共會使用到兩個 Flow,一個是用來建立 RAG 的流程,另外一個是用來處理 Line 的訊息, RAG Flow 將資料切片放入 Pinecone主要是將資料放於 Google Drive 透過 N8N 裡面的 Google drive 節點來讀取檔案內容,接下來就要使用 Pinecone 來建立向量資料庫申請 Pinecone 帳號 建立一個 Index,選擇一個 model 作為向量模型根據圖中拉取 Search files and folders 節點來讀取 Google Drive 的檔案 Download file 節點來下載檔案內容 Pinecone Vector Store 節點來將檔案內容上傳至 Pinecone 向量資料庫 建立 Pinecone Credential,輸入 API Key 和 Environment Pinecone Index 選擇剛剛在 Pinecone 建立的 IndexEmbedding Model 選擇 Google Gemini EmbeddingsData Loader下方要加上一個 Recursive Character Text Splitter 這邊就是要選擇要切割的方式,可以根據文件的特性來選擇適合的切割器,以及大小執行後就會將 Google Drive 裡面的檔案內容上傳至 Pinecone 向量資料庫整合 Line & AI & RAG FlowWebhook 節點,設定 Method 為 POST,這邊的網址就是要放在 Line OA 裡的 Messaging API Webhook URL 裡面 AI Agent 節點,設定主要的 System Prompt,這邊可以根據自己的需求來設定AI Agent 下方的 Chat model 我是選用 OpenRouter Chat Model 中的 Gemini-2.0-flash-001 AI Agent 的 Tools 下要新增一個 Pinecone Vector Store,這邊要設定剛剛建立的 Pinecone Credential 以及 Index下方的 Embedding Model 也是選用 Google Gemini Embeddings 最後一個節點是 Line 節點,這邊要設定剛剛取得的 Channel Access Token 和 Channel Secret URL : https://api.line.me/v2/bot/message/reply Method : POST Generic Auth Type : Bearer Token Send Body Body Content Type : JSON Body Parameters : replyToken :{ "replyToken":"{{ $('Webhook').item.json.body.events[0].replyToken }}", "messages":[ { "type":"text", "text": {{ JSON.stringify($json.output) }} } ] }

- gooliya.papa
- 18 Jun, 2025
如何在 Hugo 中安裝 Disqus 系統,以 PaperMod 主題為例
這邊記錄一下如何在 Hugo 中安裝 Disqus 評論系統,佈景主題為 PaperMod。 安裝步驟在 Disqus 註冊帳號並創建一個新的網站。在 Disqus 的網站設定中,找到 Shortname,這是用來識別你的網站的。在你的 Hugo 網站的 config.toml 或 config.yaml 中添加以下配置: [params] disqusShortname = "your_disqus_shortname" comments = true或者如果你使用的是 YAML 格式: params: disqusShortname: your_disqus_shortname comments: true確保你的 Hugo 佈景主題支持 Disqus。PaperMod 佈景主題已經內建支持 Disqus,所以只需要確保上述配置正確即可。複製 themes/PaperMod/layouts/partials/comments.html 到 layouts/partials/comments.html 確認 Disqus 的代碼已經包含在內。 如果沒有,你可以手動添加以下代碼到你的 layouts/partials/comments.html: {{- /* Comments area start */ -}} <div class="disqus markdown"> {{ partial "disqus.html" . }} </div> {{- /* Comments area end */ -}}建立 layouts/partials/disqus.html 檔案,並添加以下內容: {{ if .Site.Params.disqusShortname }} <div id="disqus_thread"></div> <script> var disqus_config = function () { this.page.url = '{{ .Permalink }}'; // Replace PAGE_URL with your page's canonical URL variable this.page.identifier = '{{ .File.Path }}'; // Replace PAGE_IDENTIFIER with your page's unique identifier variable }; (function() { // DON'T EDIT BELOW THIS LINE var d = document, s = d.createElement('script'); s.src = 'https://{{ .Site.Params.disqusShortname }}.disqus.com/embed.js'; s.setAttribute('data-timestamp', +new Date()); (d.head || d.body).appendChild(s); })(); </script> <noscript>Please enable JavaScript to view the <a href="https://disqus.com/?ref_noscript">comments powered by Disqus.</a></noscript> {{ end }}在 local 確認是否有完成